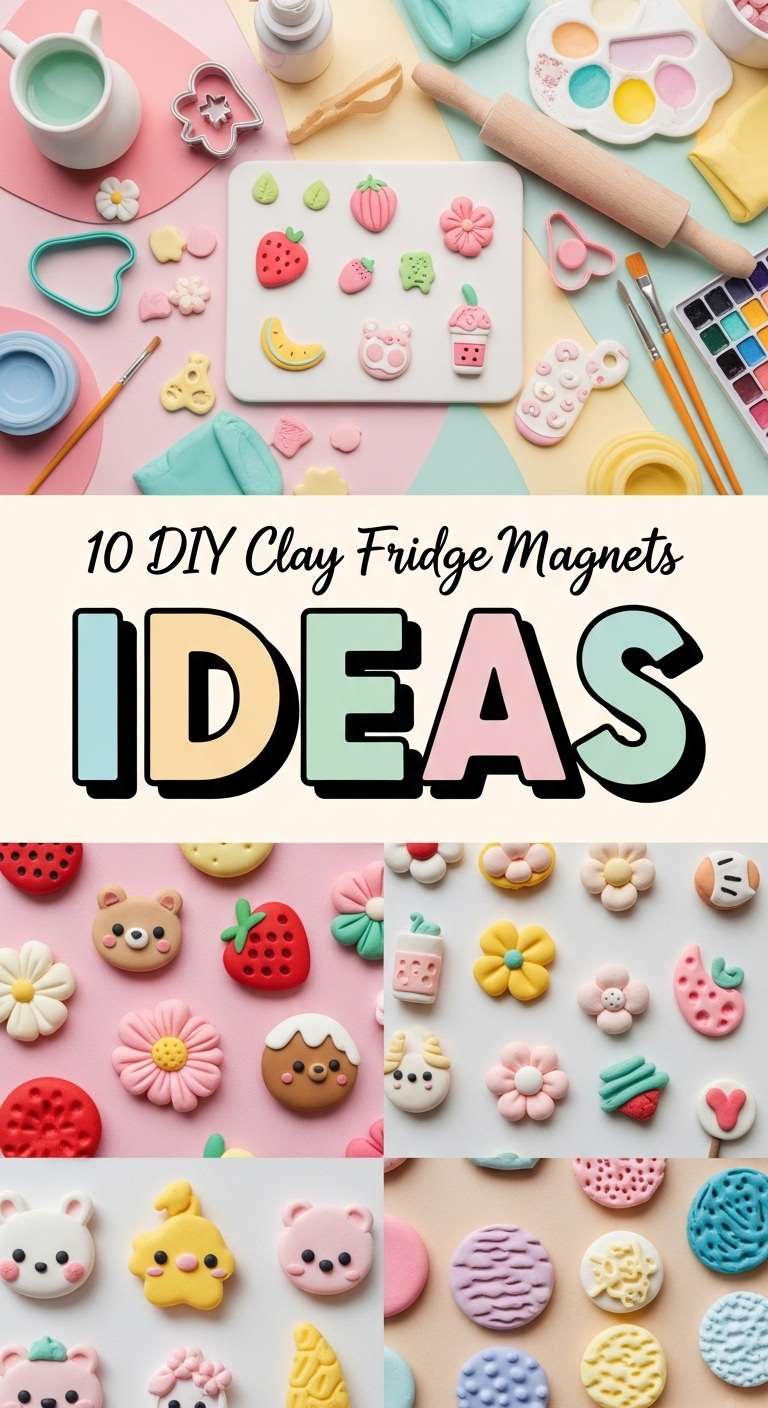
Working with air-dry or polymer clay is the perfect way to upgrade your kitchen from “cluttered” to “curated.” Because magnets are small, they are the ideal low-stakes project for beginners, yet they offer endless opportunities for detail. Whether you want to display your favorite travel photos or just keep your grocery list in place, these 10 DIY Fridge Magnets With Clay ideas will add a touch of handmade charm to your home.

1. The “Miniature Terracotta” Potted Plant
Succulents are a Pinterest staple, but real ones don’t always thrive in the kitchen. These tiny clay versions stay green forever.
- How to create it: Roll a small piece of terracotta-colored clay into a tiny “thimble” shape for the pot. Use green clay to mold tiny teardrop shapes for the succulent leaves.
- The Detail: Use a needle tool to add “spikes” to a tiny cactus for extra realism.
- Pro Tip: Use a strong Neodymium magnet for these, as the 3D clay can be slightly heavier than flat designs.

2. The “Pressed Botanical” Disk
This minimalist, Scandinavian-style magnet brings a bit of nature indoors and looks incredibly sophisticated.
- How to create it: Roll out white air-dry clay to about 5mm thickness. Press a dried flower or a sprig of rosemary into the clay with a rolling pin. Lift the plant away and use a circular cookie cutter to trim the disk.
- The Finish: Once dry, highlight the indentation with a tiny bit of gold acrylic paint or a matte varnish.

3. The “Abstract Terrazzo” Pebble
Terrazzo is one of the biggest decor trends of 2026. It’s colorful, modern, and very easy to mimic with clay scraps.
- How to create it: Use a white base of polymer clay. Flatten tiny, irregular “flakes” of black, peach, and sage green clay onto the surface. Roll them into the base until smooth, then cut into organic, pebble-like shapes.
- Why it works: It’s the perfect way to use up “scrap” clay from other projects.

4. The “Mini Polaroid” Photo Frame
Turn your fridge into a tiny gallery of memories. These frames allow you to “clip” photos without using tape.
- How to create it: Cut a rectangle out of white clay. Use a smaller rectangle cutter to remove the center, leaving a thicker “chin” at the bottom to mimic the iconic Polaroid look.
- Functionality: Glue a small clothespin to the back or leave a tiny slit at the top of the clay to slide a photo in.

5. The “Marble Stone” Hexagon
Faux-marble is timeless and adds an instant “luxury” feel to your kitchen appliances.
- How to create it: Twist together a long “snake” of white clay and a very thin string of grey or black clay. Fold and roll it until the colors swirl together—but don’t over-mix or it will just turn grey!
- The Look: Cut into sharp hexagonal shapes for a modern, geometric aesthetic.

6. The “Sassy Fruit” Collection
Fruit magnets are a kitchen classic, but adding “personality” makes them Pinterest-worthy.
- How to create it: Mold simple shapes like strawberries, lemons, or avocados. Use a fine-liner pen to draw tiny “kawaii” faces (blushing cheeks and closed eyes) on them once they are dry.
- Aesthetic Tip: Use a glossy glaze to make the fruit look juicy and bright.

7. The “Initial Stamp” Seal
Personalization is the key to a great gift. These magnets look like old-fashioned wax seals.
- How to create it: Roll a small ball of clay and flatten it slightly with your thumb to create imperfect, “raw” edges. Use a letter stamp to press an initial into the center.
- The Vibe: Use deep burgundy or forest green clay for a vintage look, or metallic gold for something more modern.

8. The “Boho Sun & Moon” Set
Celestial decor is a huge trend for bedroom and kitchen accessories alike.
- How to create it: Cut out circles and “C” shapes for the moon. Use a textured tool to create “rays” for the sun.
- The Detail: Paint them in muted earthy tones like mustard yellow, terracotta, and dusty blue.

9. The “Artisan Bread” Miniatures
For the “cottagecore” lover, tiny loaves of bread are incredibly charming and fit the kitchen theme perfectly.
- How to create it: Mold oval shapes of tan clay. Use a craft knife to “score” the top just like a sourdough loaf.
- The Secret: Use a tiny bit of brown chalk pastel dusted onto the “crust” before baking or drying to give it that “just-out-of-the-oven” toasted look.

10. The “Confetti” Heart
If you want a pop of color that feels joyful and handmade, the confetti technique is a winner.
- How to create it: Use a heart-shaped cookie cutter on a white clay base. Take tiny “micro-balls” of every color of clay you have and press them randomly onto the heart.
- Why he’ll love it: It’s a sweet, simple gesture that brightens up the morning coffee routine.


Leave a Reply