Do you have a stack of plain, orange terracotta pots sitting in your backyard or garage? While they are great for holding plants, their basic look can be a bit boring. The good news is that clay pots are like a blank canvas for your imagination. Because they are made of porous clay, they hold paint, glue, and fabric better than almost any other material.

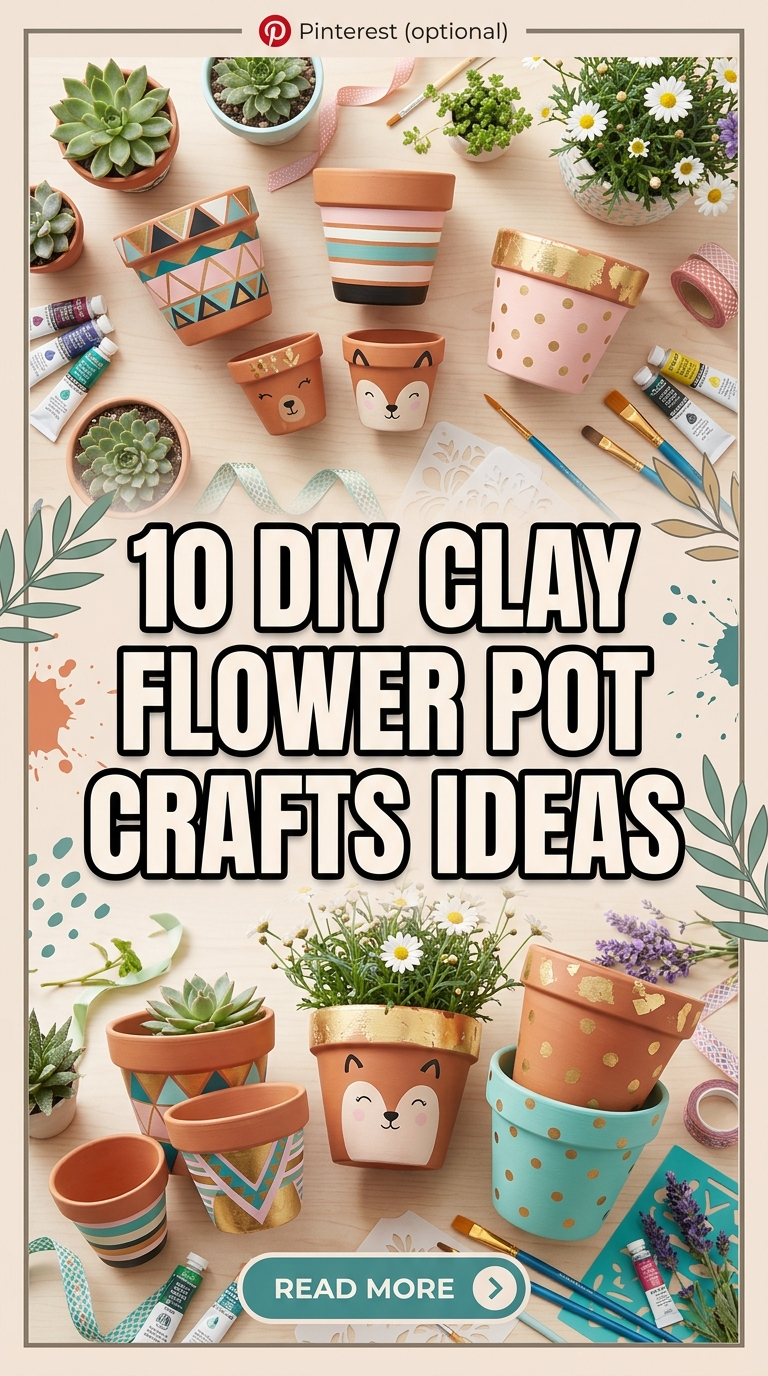
In this guide, we are exploring 10 DIY Clay Flower Pot Crafts Ideas that will take your gardening game to the next level. We aren’t just talking about a splash of paint; we are looking at textures, patterns, and even turning pots into entirely new objects like bird feeders or dessert stands. Whether you want a modern look for your office or a rustic vibe for your porch, these projects are easy, fun, and very budget-friendly. Let’s get creative and give those old pots a stunning makeover!
1. Hand-Painted Boho Pattern Pots
Bohemian style is all about patterns and personality. You can turn a simple clay pot into a piece of art using just a few paint pens. By using black and white designs on the natural orange clay, you get a high-contrast look that makes your green plants pop.
- Materials Needed:
- Clay pots (various sizes)
- White and black acrylic paint pens
- Clear matte sealer spray
- Pencil
- Steps:
- Wipe the pot clean with a damp cloth and let it dry.
- Use a pencil to lightly sketch simple patterns like triangles, dots, or “mudcloth” lines.
- Trace over your sketches with the paint pens.
- Let the ink dry for 30 minutes.
- Spray with a matte sealer to protect the design from water.
Pro Tip: If you make a mistake with the paint pen, you can usually sand it off lightly with fine-grit sandpaper once it’s dry.

2. Aged “French Garden” Lime Wash
If you love the look of ancient stone pots found in European gardens, this is the craft for you. By using a “lime wash” technique with white paint and water, you can make a brand-new pot look like it has been sitting in a misty garden for decades.
- Materials Needed:
- Terracotta pot
- White acrylic paint or chalk paint
- Water
- Old rag or sponge
- Steps:
- Mix 50% white paint with 50% water in a small cup.
- Brush the watery mixture onto the pot in random sections.
- Immediately wipe some of it away with a damp rag to let the orange clay peek through.
- Focus more paint near the rim and the bottom for a natural aged look.
- Let it dry for a chalky, textured finish.
Pro Tip: For an even more authentic look, rub a little bit of dark green paint or actual dirt into the damp white paint to mimic moss.

3. Fabric-Wrapped Decorative Planters
Sometimes paint isn’t enough to get the intricate patterns you want. Fabric decoupage allows you to wrap your pots in beautiful florals, stripes, or holiday prints. This is a great way to use up leftover fabric scraps from other projects.
- Materials Needed:
- Clay pot
- Cotton fabric scraps
- Mod Podge (Matte or Gloss)
- Foam brush
- Scissors
- Steps:
- Cut your fabric into strips or one large piece that fits around the pot.
- Apply a thick layer of Mod Podge to the surface of the clay.
- Carefully press the fabric onto the glue, smoothing out wrinkles as you go.
- Fold the excess fabric over the rim and glue it inside.
- Apply a final coat of Mod Podge over the fabric to seal it.
Pro Tip: Use thin cotton fabric; thick materials like denim or heavy canvas are much harder to wrap around the curved shape of the pot.

4. Modern Dip-Dyed Gold Pots
For a touch of luxury, try the “dip-dyed” look. By painting only the bottom half of a pot with metallic gold, you create a very modern, chic accessory for your bookshelf or desk. It’s simple, fast, and looks very expensive.
- Materials Needed:
- Small clay pots
- Metallic gold spray paint or acrylic paint
- Painter’s tape
- Plastic bag
- Steps:
- Wrap the top half of the pot in a plastic bag and secure it with painter’s tape in a perfectly straight line.
- Ensure the tape is pressed down firmly so no paint leaks under.
- Paint the exposed bottom half with gold paint.
- Remove the tape while the paint is still slightly tacky for the cleanest line.
- Let it dry upside down.
Pro Tip: Try an “omber” effect by spraying the gold heavily at the bottom and letting it fade out as you move toward the middle.

5. Clay Pot Vertical Bird Feeder
Clay pots aren’t just for plants! You can stack them to create a unique bird feeder for your yard. This project uses a saucer and a pot to create a covered “buffet” for your local birds, and it adds a pop of color to your trees.
- Materials Needed:
- 1 small clay pot and 2 clay saucers (wider than the pot)
- Strong rope or twine
- Waterproof glue (E6000)
- Drill with a masonry bit
- Steps:
- Carefully drill a hole through the center of both saucers and the bottom of the pot.
- Glue one saucer to the top of the pot (acting as a roof) and one to the bottom (acting as the tray).
- Thread the rope through all three pieces and tie a large knot at the bottom.
- Fill the bottom saucer with birdseed.
- Hang it from a sturdy branch.
Pro Tip: Paint the “roof” saucer a bright color like red or yellow to attract more birds to your garden.

6. Coastal Rope-Wrapped Pot
Bring the beach to your porch by wrapping your pots in thick jute or sisal rope. This hides the plain clay and adds a wonderful natural texture that fits perfectly with coastal or nautical decor.
- Materials Needed:
- Large clay pot
- Roll of jute or sisal rope
- Hot glue gun
- Seashells (optional)
- Steps:
- Start at the base of the pot and glue the end of the rope down.
- Wind the rope tightly around the pot, adding a bead of glue every few inches.
- Keep the rows tight so no clay shows through.
- When you reach the rim, cut the rope and glue the end inside the pot.
- (Optional) Glue a few small seashells near the rim as a final touch.
Pro Tip: Use different shades of rope (like bleached white and natural brown) to create striped patterns.

7. Chalkboard Label Pots
If you have an indoor herb garden, you know how hard it is to remember which plant is which. Chalkboard pots solve that problem while looking incredibly cute. You can write the name of the plant directly on the pot and change it whenever you want.
- Materials Needed:
- Clay pots
- Chalkboard paint (black)
- Chalk or chalk markers
- Painter’s tape
- Steps:
- Tape off a square or a band around the middle of the pot.
- Paint the inside of that area with two coats of chalkboard paint.
- Let it dry for 24 hours.
- “Season” the paint by rubbing the side of a piece of chalk over the whole surface and wiping it off.
- Write your herb names (Basil, Thyme, etc.) in your best handwriting.
Pro Tip: Chalk markers give a much cleaner, more professional look than traditional dusty chalk sticks.

8. Stenciled “Talavera” Style Pots
Talavera is a famous Mexican pottery style known for bright colors and intricate floral patterns. You can mimic this look using stencils. It’s a great way to add a burst of energy and color to a sunny patio or kitchen window.
- Materials Needed:
- Clay pot
- Bright blue, yellow, and orange acrylic paints
- Small mandala or floral stencils
- Sponges for dabbing
- Steps:
- Paint the entire pot a solid base color (like bright white or deep blue).
- Once dry, hold the stencil firmly against the side.
- Use a sponge to lightly dab a contrasting color through the stencil.
- Repeat the pattern around the entire circumference of the pot.
- Add small dots of paint by hand to fill in any empty spaces.
Pro Tip: Use very little paint on your sponge to prevent the paint from bleeding under the edges of the stencil.

9. Mosaic Broken China Pots
Don’t throw away that chipped plate or broken mug! You can use the pieces to create a stunning mosaic on a clay pot. This creates a textured, “shabby-chic” look that is completely one-of-a-kind.
- Materials Needed:
- Large clay pot
- Broken ceramic pieces (plates, tiles, or glass gems)
- Tile adhesive or strong glue
- Pre-mixed grout
- Sponge
- Steps:
- Glue your ceramic pieces onto the pot, leaving small gaps between them.
- Once the glue is dry, spread grout over the entire surface, filling the gaps.
- Use a damp sponge to wipe the excess grout off the faces of the ceramic pieces.
- Let it cure for 24 hours.
- Buff the pieces with a dry cloth to make them shine.
Pro Tip: Wear gloves when handling broken ceramic to avoid small cuts on your fingers!

10. Tiered Clay Pot Dessert Stand
This is one of the most creative 10 DIY Clay Flower Pot Crafts Ideas for parties. By flipping pots upside down and gluing saucers on top, you can create a beautiful tiered stand for cupcakes, cookies, or fruit.
- Materials Needed:
- 2 pots (one medium, one small)
- 2 saucers (one large, one medium)
- Spray paint (pastel colors work great)
- Strong waterproof glue
- Steps:
- Paint all your pieces and let them dry completely.
- Turn the medium pot upside down and glue the large saucer to its bottom.
- Glue the small pot (upside down) to the center of that saucer.
- Glue the smaller saucer to the top of the small pot.
- Check that everything is centered and let it dry for a full day.
Pro Tip: Place a paper doily on the saucers before adding food to make it look even more elegant and keep the paint safe.

Tips & Tricks for Clay Pot Success
- Seal the Inside: If you are actually planting in your decorated pots, seal the inside with a waterproof sealer. This prevents moisture from seeping through the clay and bubbling your paint on the outside.
- Avoid High Heat: Hot glue is great for many things, but if your pots will sit in the direct summer sun, it might melt. Use a permanent industrial glue like E6000 for outdoor projects.
- Sand the Surface: Some clay pots have a waxy coating. A quick rub with sandpaper helps your paint and glue stick much better.
Common Mistakes to Avoid
- Forgetting the Drainage Hole: Never block the hole at the bottom of the pot if you are putting a real plant inside. Your plant needs to breathe!
- Painting Damp Pots: If your pots were outside in the rain, let them dry for a few days before painting. Trapped moisture will cause the paint to peel almost immediately.
- Too Much Grout: When doing a mosaic, don’t let the grout dry too long on the “pretty” side of your tiles, or it will be very hard to scrub off.
Conclusion
Updating your garden or home decor doesn’t have to be expensive. These 10 DIY Clay Flower Pot Crafts Ideas show just how versatile a simple terracotta pot can be. From elegant gold-dipped designs to fun bird feeders, there is a project here for every style and skill level.
Which one will you try first? Grab some paint and a few pots this weekend and start transforming your space. Your plants (and your neighbors) will thank you!


Leave a Reply