There’s something quietly magical about pouring liquid resin and watching it transform into glossy, glass-like art right before your eyes. The first time I mixed resin with a few drops of pigment and saw it swirl into unexpected patterns, I completely understood why so many people fall in love with this craft. It’s part chemistry experiment, part painting session, and part meditation.
If you’ve been scrolling through gorgeous resin trays, jewelry, and coasters online and wondering whether you could actually make them yourself, the answer is a heartfelt yes. Resin art looks fancy, but most beginner projects are surprisingly forgiving. With a handful of supplies, a bit of patience, and a well-ventilated spot to work, you can create handmade pieces that genuinely look like they came from a boutique shop.
These 10 resin art craft ideas for beginners are designed to help you build confidence one pour at a time. Each project uses affordable materials, simple techniques, and clear steps so you can focus on the fun part: creating something uniquely yours. Whether you want to make gifts, refresh your home decor, or simply try a new hobby, these resin projects are a wonderful place to start.
Quick Answer: Resin art is a beginner-friendly craft that involves mixing two-part epoxy resin with colors, pigments, or inclusions and pouring it into molds or onto surfaces to create glossy, durable pieces. Popular starter projects include coasters, jewelry, bookmarks, trays, keychains, wall art, paperweights, drawer knobs, bookends, and decorative dishes. Most projects require only basic tools, a few hours of curing time, and minimal artistic experience to produce beautiful, gift-worthy results.
1. Resin Coasters with Alcohol Ink Swirls
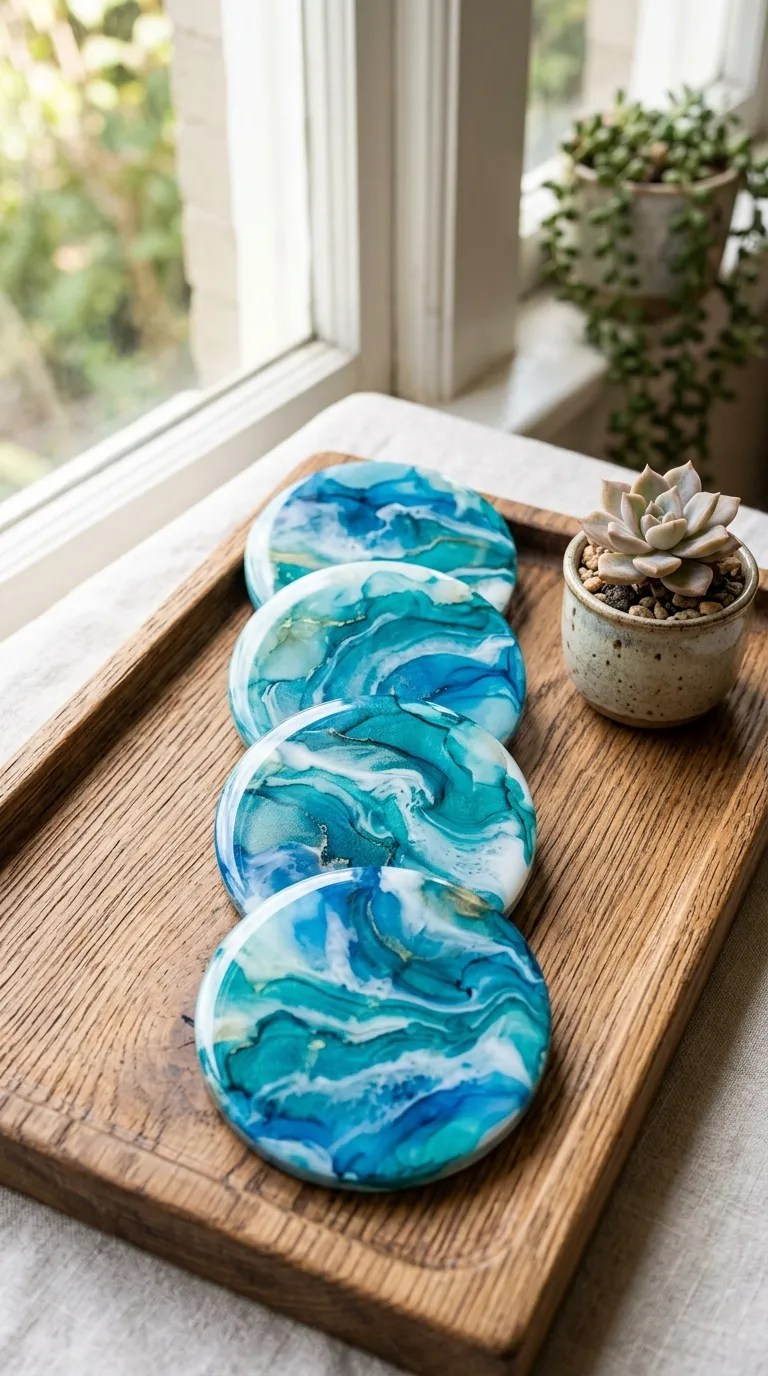
Resin coasters are the classic first project for a reason. They cure relatively quickly, fit perfectly into silicone molds, and give you a forgiving surface to practice mixing colors and pouring techniques. Alcohol ink creates dreamy, fluid swirls that look far more complicated than they actually are.
Materials you’ll need: two-part epoxy resin, silicone coaster molds, alcohol inks in three or four colors, a disposable mixing cup, wooden stir sticks, nitrile gloves, a respirator or working near an open window, and a heat gun or kitchen torch.
Steps: Mix approximately two ounces of resin according to the package directions, stirring slowly for the full recommended time to reduce bubbles. Divide the resin into small cups, one for each ink color. Add two or three drops of ink per cup and stir gently. Pour the colors into the mold in layers, tilting the mold slightly between pours so the colors blend organically. Use a heat gun held several inches away to pop surface bubbles and encourage movement in the design.
Time and difficulty: Active time is around 20 minutes, and coasters typically cure in 24 hours. This project is genuinely beginner-friendly and ranks as the easiest way to learn color flow.
Customization ideas: Try ocean blues and teals for a coastal look, soft pastels for a nursery set, or warm metallics like copper and gold for an elegant hostess gift. You can also embed dried flowers, gold leaf, or tiny shells before the resin fully cures.
Display suggestion: Group four coasters on a wooden tray with a small succulent or a stack of coffee table books for an inviting vignette.